The Ultimate Guide to Grill pans — Everything You Need to Know
If you love the look and flavor of outdoor grilling but don’t always have access to a backyard or a full grill, Grill pans bring that experience indoors. A ridged surface creates sear marks, lifts food away from excess fat, and concentrates heat to produce Maillard reactions — that toasty caramelized flavor we crave. But grill pans do more than replicate a grate: they can act as griddles, searing platforms, and roasting bases. Depending on the material and design, a single Grill pan can be your daily driver for breakfasts, weeknight dinners, and impressive weekend feasts.
This guide is written for home cooks, outdoor enthusiasts, and anyone who wants to upgrade their cookware knowledge. Expect practical buying advice, step-by-step techniques, and dozens of recipes (from steak to sandwiches to desserts) that showcase the full potential of Grill pans.
Why Choose a Grill Pan? Advantages of Indoor Grilling
While outdoor grilling has its charm, grill pans offer unique benefits:
Weather Independence: Grill regardless of rain, snow, or space constraints.
Speed and Convenience: Preheating takes minutes, ideal for quick meals.
Precise Heat Control: Adjust temperatures instantly on your stovetop.
Healthier Cooking: Raised ridges allow excess fat to drain away.
Perfect Searing: Achieve professional grill marks and flavorful crusts.
Ideal for Small Portions: Efficiently cook single servings without firing up a large grill.
Types of Grill Pans: Materials and Properties
The material of your grill pan significantly impacts its performance:
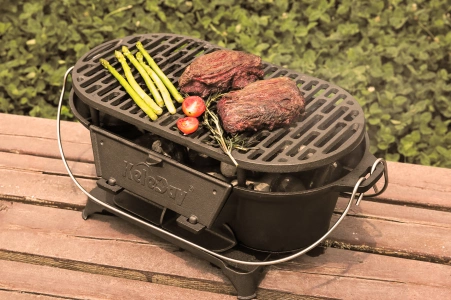
Cast Iron Grill Pans
Pros: Superior heat retention, naturally non-stick when seasoned, extremely durable, oven-safe.
Cons: Heavy, requires regular seasoning, reactive to acidic foods.
Ideal For: Achieving the best sear and even heating.
Enameled Cast Iron Grill Pans
Pros: Excellent heat retention, no seasoning required, resistant to acids and rust.
Cons: Expensive, enamel can chip if mishandled.
Ideal For: Those who want cast iron performance with easier maintenance.
Non-Stick Aluminum Grill Pans
Pros: Heats quickly, lightweight, easy food release, simple cleanup.
Cons: Non-stick coating may degrade over time, not suitable for very high heat.
Ideal For: Everyday cooking where convenience is key.
Stainless Steel Grill Pans
Pros: Highly durable, resistant to scratches and corrosion, works with metal utensils.
Cons: Food may stick without proper preheating and oiling.
Ideal For: Cooks comfortable with temperature control and oil management.
Design features that matter in a Grill pan
Beyond material, certain design elements influence performance and convenience.
Ridge height and spacing: Tall, well-spaced ridges create prominent sear marks and better fat drainage, but may make flipping small items tricky. Low, closely spaced ridges offer more contact for thin foods.
Pan depth and drip channels: Some grill pans include peripheral drip channels to collect rendered fat. This makes cleanup easier and can reduce smoke.
Handle design: Long handles keep hands away from heat. Some pans have helper handles opposite the main handle for two-handed lifting — important for heavy cast iron. Heat-resistant silicon grip covers are a useful safety add-on.
Oven compatibility: Many cast iron and stainless pans are oven safe; ensure handles and coatings are rated for intended oven temperatures.
Flat vs. round vs. square shapes: Square pans maximize cooking surface for stovetop use; round pans may suit oven or campfire placement better.
Perforation/venting: Perforated grill pans let smoke and flame contact food (great for smoky flavor) but allow small pieces to fall through. Choose based on desired smoky intensity and food type.
Lid option: Some grill pans pair with lids — useful for melting cheese, finishing thicker cuts, or oven bread.
Choosing the right Grill pans: a practical buying guide
Before you buy, consider these questions and criteria:
1. What heat sources will you use?
Gas stove & open flame: Heavy cast iron is excellent.
Electric coil or flat glass top: Choose flatter, lighter pans (some heavy cast iron may not seat well on glass tops).
Induction: Ensure the pan’s material is induction-compatible (cast iron and stainless steel typically are).
Outdoor/Camping: Look for durable, possibly enamel-coated cast iron or lightweight aluminum for portability.
2. How many people will you cook for?
Singles or couples: a 9–11 inch pan may suffice.
Families or guests: get 12–15 inch or square pans for more surface area.
3. What types of food will you cook most?
Thick steaks, crusted fish, seared vegetables: heavy cast iron or carbon steel.
Delicate fish and eggs: nonstick aluminum or enamel surfaces.
Multi-purpose use including oven work: oven-safe cast iron performs best.
4. Maintenance preference
Love the ritual of seasoning: plain cast iron.
Prefer low maintenance: enameled cast iron or stainless steel.
5. Budget & Longevity
Entry level nonstick aluminum: lower cost but shorter life.
Mid-range stainless/cast alternatives: good balance of price and durability.
Premium cast iron or enameled brands: expensive upfront but last decades.
When you’re shopping, test the balance and handle sturdiness, inspect the finish, and verify manufacturer ratings for maximum temperature and dishwasher safety (but remember — handwashing is usually recommended for long life).
Prepping & preheating: the secrets to perfect searing on Grill pans
Many sticking or uneven sear problems come from skipping the preheat. Follow this workflow:
Clean & dry the pan — ensure there’s no leftover residue from prior cooking.
Apply a thin oil layer (for pans requiring it). For seasoned cast iron, a light wipe with high smoke point oil (canola, grapeseed) is enough. Too much oil creates smoking and flareups.
Preheat gradually — place the pan on medium heat for 3–6 minutes (longer for heavy cast iron). The pan should be hot to a hand held a few inches above without burning sensation.
Test with a drop of water — on a properly preheated pan, water should sizzle, bead, and evaporate quickly; on cast iron, it may dance (indicative of adequate heat).
Sear in batches — avoid overcrowding. Dense batches bring down pan temperature, causing steaming rather than searing.
Let food develop a crust — resist flipping too soon. Meat will release from sear once an initial crust is formed.
Pro tip: For thick cuts, sear on the pan, then finish in the oven for even doneness — a classic reverse sear or sear-then-roast technique.
Cooking techniques & advanced methods with Grill pans
Below are techniques you can master to get the most from your Grill pans.
Direct high-heat searing
Great for steaks, tuna, pork chops. Get the pan scorching hot, add oil, and sear on both sides until desired crust forms. Use tongs to flip; finish in oven for thick cuts.
Indirect finish
After achieving a sear, transfer cast iron pans to a preheated oven (350–450°F depending on recipe) to finish cooking without burning the exterior.
Smoking with wood chips
Place a small foil packet of soaked wood chips near the pan or directly on coals if using a fire. For stovetop, use a small smoking cone or a covered pan to trap smoke and flavor.
Steam-assisted melting
After searing, add a splash of water, stock, or wine, and quickly cover with a lid to generate steam — perfect to melt cheese on burgers or finish delicate fish.
Grill pan roasts & braises
Use deep-sided cast iron grill pans with lids for braises. Sear then add aromatics and liquids to finish with low, steady heat.
Plancha effect
Some cast/steel flat surfaces can be used on one side as a griddle (plancha) for flatbreads, scallops, or pancakes when flipped.
Reverse sear
Slowly bring the protein up to near desired internal temp in the oven, then finish with a quick hot sear on the grill pan for an evenly cooked interior with a perfect crust.
Using Grill pans outdoors — camp and picnic tips
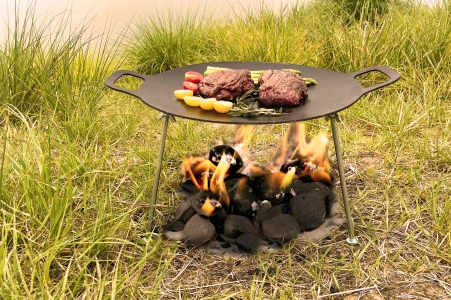
A heavy cast iron grill pan pairs beautifully with camp stoves and open flames. Tips for outdoor cooking:
Protect pan base: Place on stable grill grate or use tripod to keep pan level.
Use coals for even heat: Surround pan with even coals; avoid direct high flame that can blister seasoning.
Bring a lid: Lids help control flareups and can be used to create steam pockets.
Preheat on a burner, finish on coals: Preheat on a stove to get even heat then move to coals for charred flavor.
Pack care kit: Wire brush, chainmail scrubber, oil, and a soft cloth for maintenance after the trip.
Because Grill pans are versatile, campers can make breakfast eggs, fried fish, pancakes, and steaks — all on one pan.
Cleaning, seasoning, and long-term care of Grill pans
Proper care extends your grill pan’s life:
Cast Iron: Clean with hot water and a stiff brush, dry completely, and apply a thin layer of oil.
Enameled Cast Iron: Wash with soapy water and a soft sponge; avoid abrasive tools.
Non-Stick: Use mild detergent and a soft cloth; avoid metal utensils.
Stainless Steel: Soak to loosen residue, scrub with a nylon brush, and use baking soda for stubborn stains.
Health, safety and environmental considerations for Grill pans
Health
Cooking at high heat creates some compounds (heterocyclic amines, polycyclic aromatic hydrocarbons) especially in charred meats. Balance with vegetables and avoid excessive charring.
Cast iron imparts small amounts of iron into food — beneficial for some but a consideration for those with iron overload conditions.
Safety
Use oven mitts and long handles to prevent burns.
Keep children away from hot surfaces and open flames.
Avoid using damaged nonstick pans at high temperatures.
Environmental
Durable cookware (cast iron, stainless) reduces waste compared to disposable nonstick items.
When camping, avoid leaving behind coals; use local regulations for campfires and minimize wood use.
Sustainability & lifecycle: how Grill pans fit into a greener kitchen
Durable materials like cast iron and stainless steel reduce the need for frequent replacement, which lowers overall environmental impact. Look for manufacturers using recycled materials or offering repair/return programs. When an enameled pan chips or an old nonstick pan fails, recycling or repurposing options should be considered.
Seasoning maintains performance and avoids chemical coatings that can wear out. A pan that’s maintained can be passed down, reducing waste.
The future of Grill pans — innovations and trends
Hybrid surfaces: Combining the searing performance of cast iron with easy-clean coatings.
Smart cookware: Embedded thermistors and app integration for precise searing control.
Lightweight high-performance alloys: For camping and traveling cooks.
Sustainably produced cast iron: Using recycled iron and greener foundry practices.
Modular outdoor kits: Grill pan, griddle, and Dutch oven combos that nest for compact transport.
These trends will continue to make Grill pans more accessible and specialized for diverse cooking needs.
Conclusion: Why a Grill pan is one of the best cookware investments
Mastering grill pans opens unlimited culinary horizons that bring authentic grilled flavors and professional presentation standards into any kitchen environment. Whether creating perfect steakhouse dinners, developing innovative vegetable preparations, or designing elaborate multi-course meals showcasing advanced techniques, quality grill pan equipment provides the foundation for cooking experiences that rival any restaurant while enabling unique culinary adventures in your own home. Understanding selection principles, developing proper techniques, and implementing excellent maintenance practices ensures your grill pan becomes an indispensable tool for countless cooking adventures that create lasting memories and deepen your appreciation for the culinary arts.
If you’re choosing your first grill pan or upgrading to a heavier, more professional model, consider what you cook most, your preferred heat source (stove, campfire, or induction), and how much maintenance you’re willing to perform. Then preheat, sear confidently, and enjoy the char, the sizzle, and the flavor — all delivered by the humble, powerful Grill pans.